Showing posts with label DIY. Show all posts

Sunday, June 23, 2013

Green Fingers- Gardening On A Budget!

Hey Everyone, 
In an attempt to make my flat more homely on Thursday I went down to woodies and with 30 Euro, got lots of plants, and along with my cute blue pot I got last year in Dunne's attempted a little bit of gardening to brighten the place up. I'm not going to lie it didn't quite turn out how I had planned I'm not the best gardener in the world but I'm happy with the outcome now!
So what do you think of my attempts?

Also if you have a minute to spare Please Nominate for me HERE! for the Irish Blog Awards 2013! It would mean so much to me! I would love to be nominated in the categories...Best Popculture Blog, Best Designed Blog, and Best Beauty/Fashion Blog! Thank you! x

Wednesday, February 13, 2013

Valentines Day Series: DIY Chocolates

Hey Everyone,
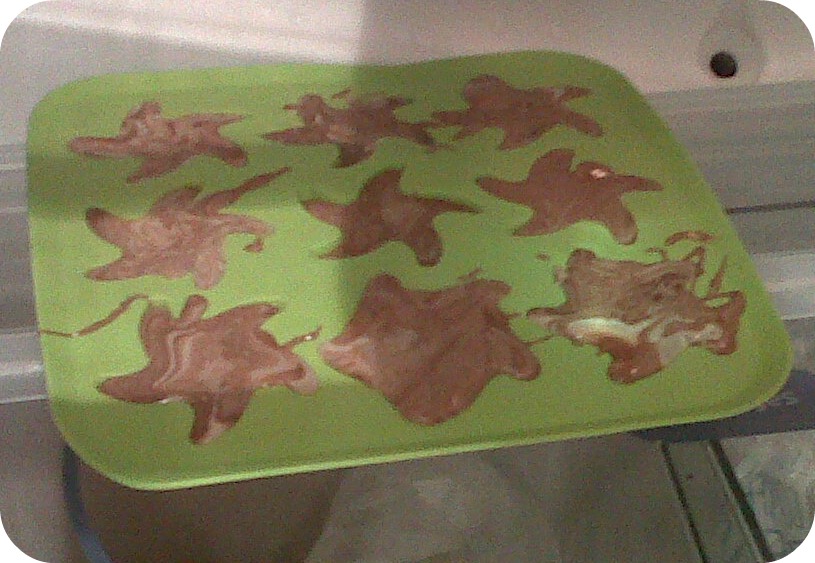
If your looking for a last minute valentines gift for a loved one this is a great idea, something that's quick easy and homemade! I would of liked to make heart chocolates, I went to Ikea but their heart ice cube trays had sold out. Instead I got the star tray which are still nice (and slightly less girly I suppose)! 
What you will need:
1. Chocolate (of your choice)
2. Any filling (Raisins, fruit, honeycomb etc...)
3. Bain-Marie (Bowl on top of a sauce pan of hot water)
4. Mixing spoon
5. Silicon Ice cube tray (Ikea do great shaped ones)
6. Container and decoration

Follow these instructions to make your own chocolates:
Step 1:
 Melt your chosen chocolate in a bowl over hot water (be super careful use a bowl suitable for this... that can take the heat, and if your young get an adult to help!)
Step 2:
 Add in any extras like fruits or a great idea is a mashed up crunchie bar! (I'm folding in a milk chocolate to get a marbled effect!)
Step 3: 
Pour into mold (I'm using a silicone ice cube tray) You may need to repeat the process if you have excess chocolate but only have one set of molds!
Step 4:
 Leave to fully cool and set in the fridge
Step 5:
 Once cooled you can pop the chocolates out and put into a container
Step 6:
 Decorate- (If your wrapping in clingfilm something simple like a ribbon looks pretty!)
I'm putting mine into a jar, covering lid with fabric and then tying on a ribbon!

Other Posts From My Valentines Series:


Finished and Ready to enjoy! What do you think of the homemade chocolates?

Tuesday, February 12, 2013

Hey Everyone, 
today's post is how to make a cute personalized T-shirt. It is something a little different that adds an extra personal touch to a gift this valentines! 
What you will need:
1. A plain T-shirt (I used my sweatshirt that I got in the H&M sale)
2. Your own design
3. T-shirt Transfer Paper (I got mine from Amazon) 
4. Iron
5. Printer
6. Scissors

Follow these easy steps to create your own T-shirt:
1. Create a Design for your T-shirt
2. Then put it into Word or another programme which will enable you to print your design on A4
3. Select print properties and ensure your printing in best quality, and mirror image (you need the design to print back to front so that it is the right way around on the T-shirt)
4. Print your design
 5. Cut out your design
6. Iron your t-shirt to get rid of creases and warm the fabric
 7. Place your design onto the t-shirt where you would like it to sit
8. Iron on, use a warm iron, and press down firmly (If your young get an adult to do this for you)
9. Leave to cool and then peel off! 

Other Posts From My Valentines Series:

What do you think of my DIY T-shirt? 

Wednesday, February 6, 2013

Hey Everyone,
Today's post is the next in my valentines series...and it is another DIY! This time my DIY addiction has taken me into jewelry making, and this post should show you how to make a cute necklace from some nail varnishes and an old key!
What you will Need:
1. An Old Key (obviously one you don't use!)
2. A Ribbon Or Chain
3. Nail Varnish Colours Of Your Choice, Or Paint 
4. Clear Top Coat 
Follow these steps to make your own key necklace:
Step 1:
Find an old key (obviously one that you don't use anymore!) and give it a quick clean with washing up liquid to remove any residue  
Step 2:
Put down some tissue or newspaper to protect the table, then begin to paint your key
Step 3: 
If your creating an Ombre key like mine use a clear nail varnish to blend or water if your  using paint 
 Step 4:
Complete first coat and hang to dry! (You are probably going to have to do a couple of coats to get the key looking like enamel)
  Step 5: 
Layer up as many coats as you need but don't forget to blend if your creating an ombre effect, and leave the key to dry properly to stop any smudging!
Step 6: 
Once dry apply one top clear coat to seal all the colours, once dry you can hang your key on a chain or ribbon of your choice!
Optional:
You could do any colours, keeping it classically valentines themed with pink/red, creating patterns or heart, or even using glitter!

Other Posts From My Valentines Series:

What do you think of the DIY Key To My Heart Necklace?


Monday, February 4, 2013

Valentines Day Series: DIY Heart Keyring

Hey Everyone,
Today's post is the first from my new valentines series. In this post I will show you how to create a heart keyring through an easy DIY tutorial!
This would be a great inexpensive present for a loved one/family member, plus who doesn't like homemade presents!
 What You Will Need:
1. Coloured Felt
2. Coloured Thread
3. Scissors
4. Pen/Marker
5. Needle
6. Stuffing
7. Keyring
Follow these simple steps to make your keyring:
Step 1:
 Fold your felt in half and mark out your shape (make sure your drawing on the back of the fabric so it won't be seen!)
Step 2: 
Cut out your shape (because the fabric was folded in half you should end up with two shapes)
Step 3: 
Put the cut out shapes on top of each other and sew together (I used a blanket stitch but you can use whatever stitch you know) ...Leave a small gap for stuffing!
Step 4: 
Now you can fill your shape with stuffing, Wadding, Cotton wool, Tissue, or left over felt are all fine!
Then close up the gap by continuing your stitching!
Step 6: 
Attach your keyring by creating a loop at the top of your shape and then knotting the thread! 

Other Posts From My Valentines Series:

What do you think of the Heart Keyring?

Sunday, February 3, 2013

Valentines Day Series: Introduction

Hey Everyone,
This post is just a quick introduction to my valentines series it will include lots of gift ideas, and DIY! Don't worry I won't be rambelling on about fluffy, cheesy, lovey dovey stuff just you wait and see! 

The posts will be starting tomorrow and ending on valentines day! You can check back here for links of posts as they go live, as well as at the bottom of each post in the series! 

...and don't forget you don't have to have a boyfriend/girlfriend or be married to enjoy the day, just appreciating friends, family, and other loved ones can be just as nice!

Other Posts From My Valentines Series:

What do you think of valentines day?

Friday, November 30, 2012

DIY: Simple and Cute Personalized Present Tag

Hey Everyone, 
Today's Post is a follow up from my Vintage style wrapping in my last post which you can find HERE! 
Its a really simple way of making a personalized Tag to put on your presents! 

You Will Need:
Garden Wire/ Or another type of wire
Twine or String
Metallic Paint of your choice

Making the Tag:
1. Make a loop with wire
2. Wrap Wire around the loop to stiffen and create extra strength
3. Snip of the end of the wire and shape (you could create stars, trees, hearts, or whatever you can think of!)
 4. Wrap your chosen twine or string all the way around the shape 
 5. Then wined in and out the shape building up the shape to make it 3D, Make it as neat or shabby chick as you want!
 6. Knot the end of the string to another piece within the shape 
7. Pour out some of your chosen paint put some on your finger or a brush dab off onto tissue to get rid of excess then dab onto the shape 
 8. Leave to dry then attach to your present! 

So What do you think? Are you personalizing your presents in anyway?